Embroidery Digitizing for Patches: 5 Common Myths Debunked for 2026
That “one-click” AI software you recently upgraded to might be the primary reason your embroidery machines are sitting idle. Most people treat embroidery digitizing for patches as a simple graphic conversion; it’s actually an complex engineering feat of tension management. You’ve likely dealt with the frustration of frequent thread breaks, puckered borders, or wasted material that eats into your profit. It’s exhausting to manage client expectations when your files won’t run smoothly on the production floor.
You can eliminate these bottlenecks by understanding why professional manual pathing remains the gold standard for production-ready files. This guide will show you how to avoid the expensive pitfalls of automated software and achieve the sharp, clean results your clients demand. We’ll help you secure the reliable, 12-hour turnarounds necessary to stay competitive and keep your machines running at peak capacity.
We’re debunking five persistent myths that are stalling shop workflows in 2026. From the “one file fits all” fallacy to the hidden costs of “budget” automated tools that only reach 85% accuracy, we’re providing the technical clarity you need to ensure every patch is delivered with precision.
Key Takeaways
- Understand why manual pathing is essential for managing physical thread overlap that automated software can’t calculate.
- Learn how push-pull compensation and strategic underlay prevent distorted borders and puckering on the production floor.
- Discover why embroidery digitizing for patches requires unique structural adjustments compared to standard left-chest logos.
- Follow a professional 4-step workflow to ensure your files are production-ready before they reach the machine.
- Calculate the true ROI of professional services by reducing expensive machine downtime and wasted materials.
The ‘One-Click’ Myth: Why Auto-Digitizing Fails for Patches
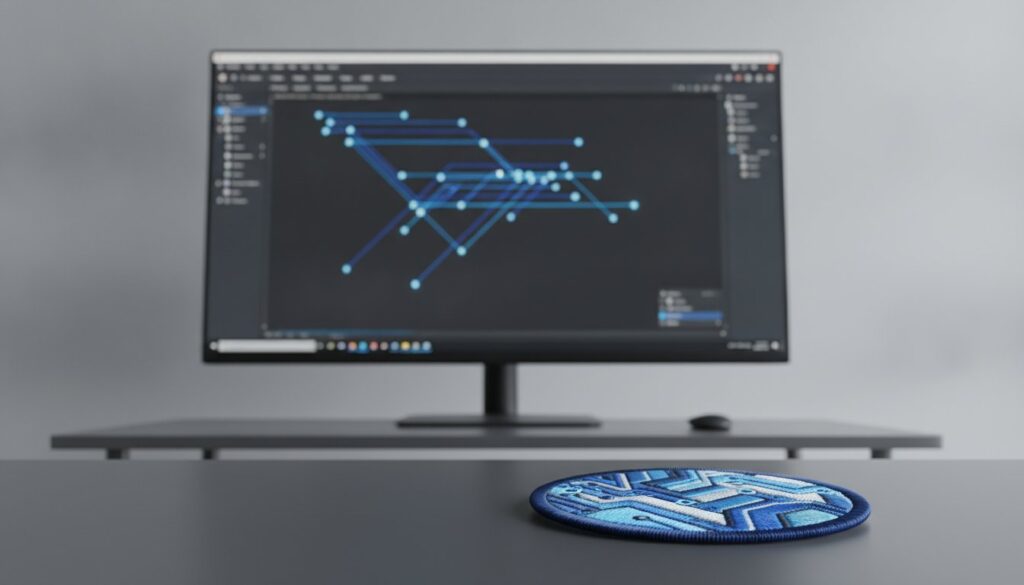
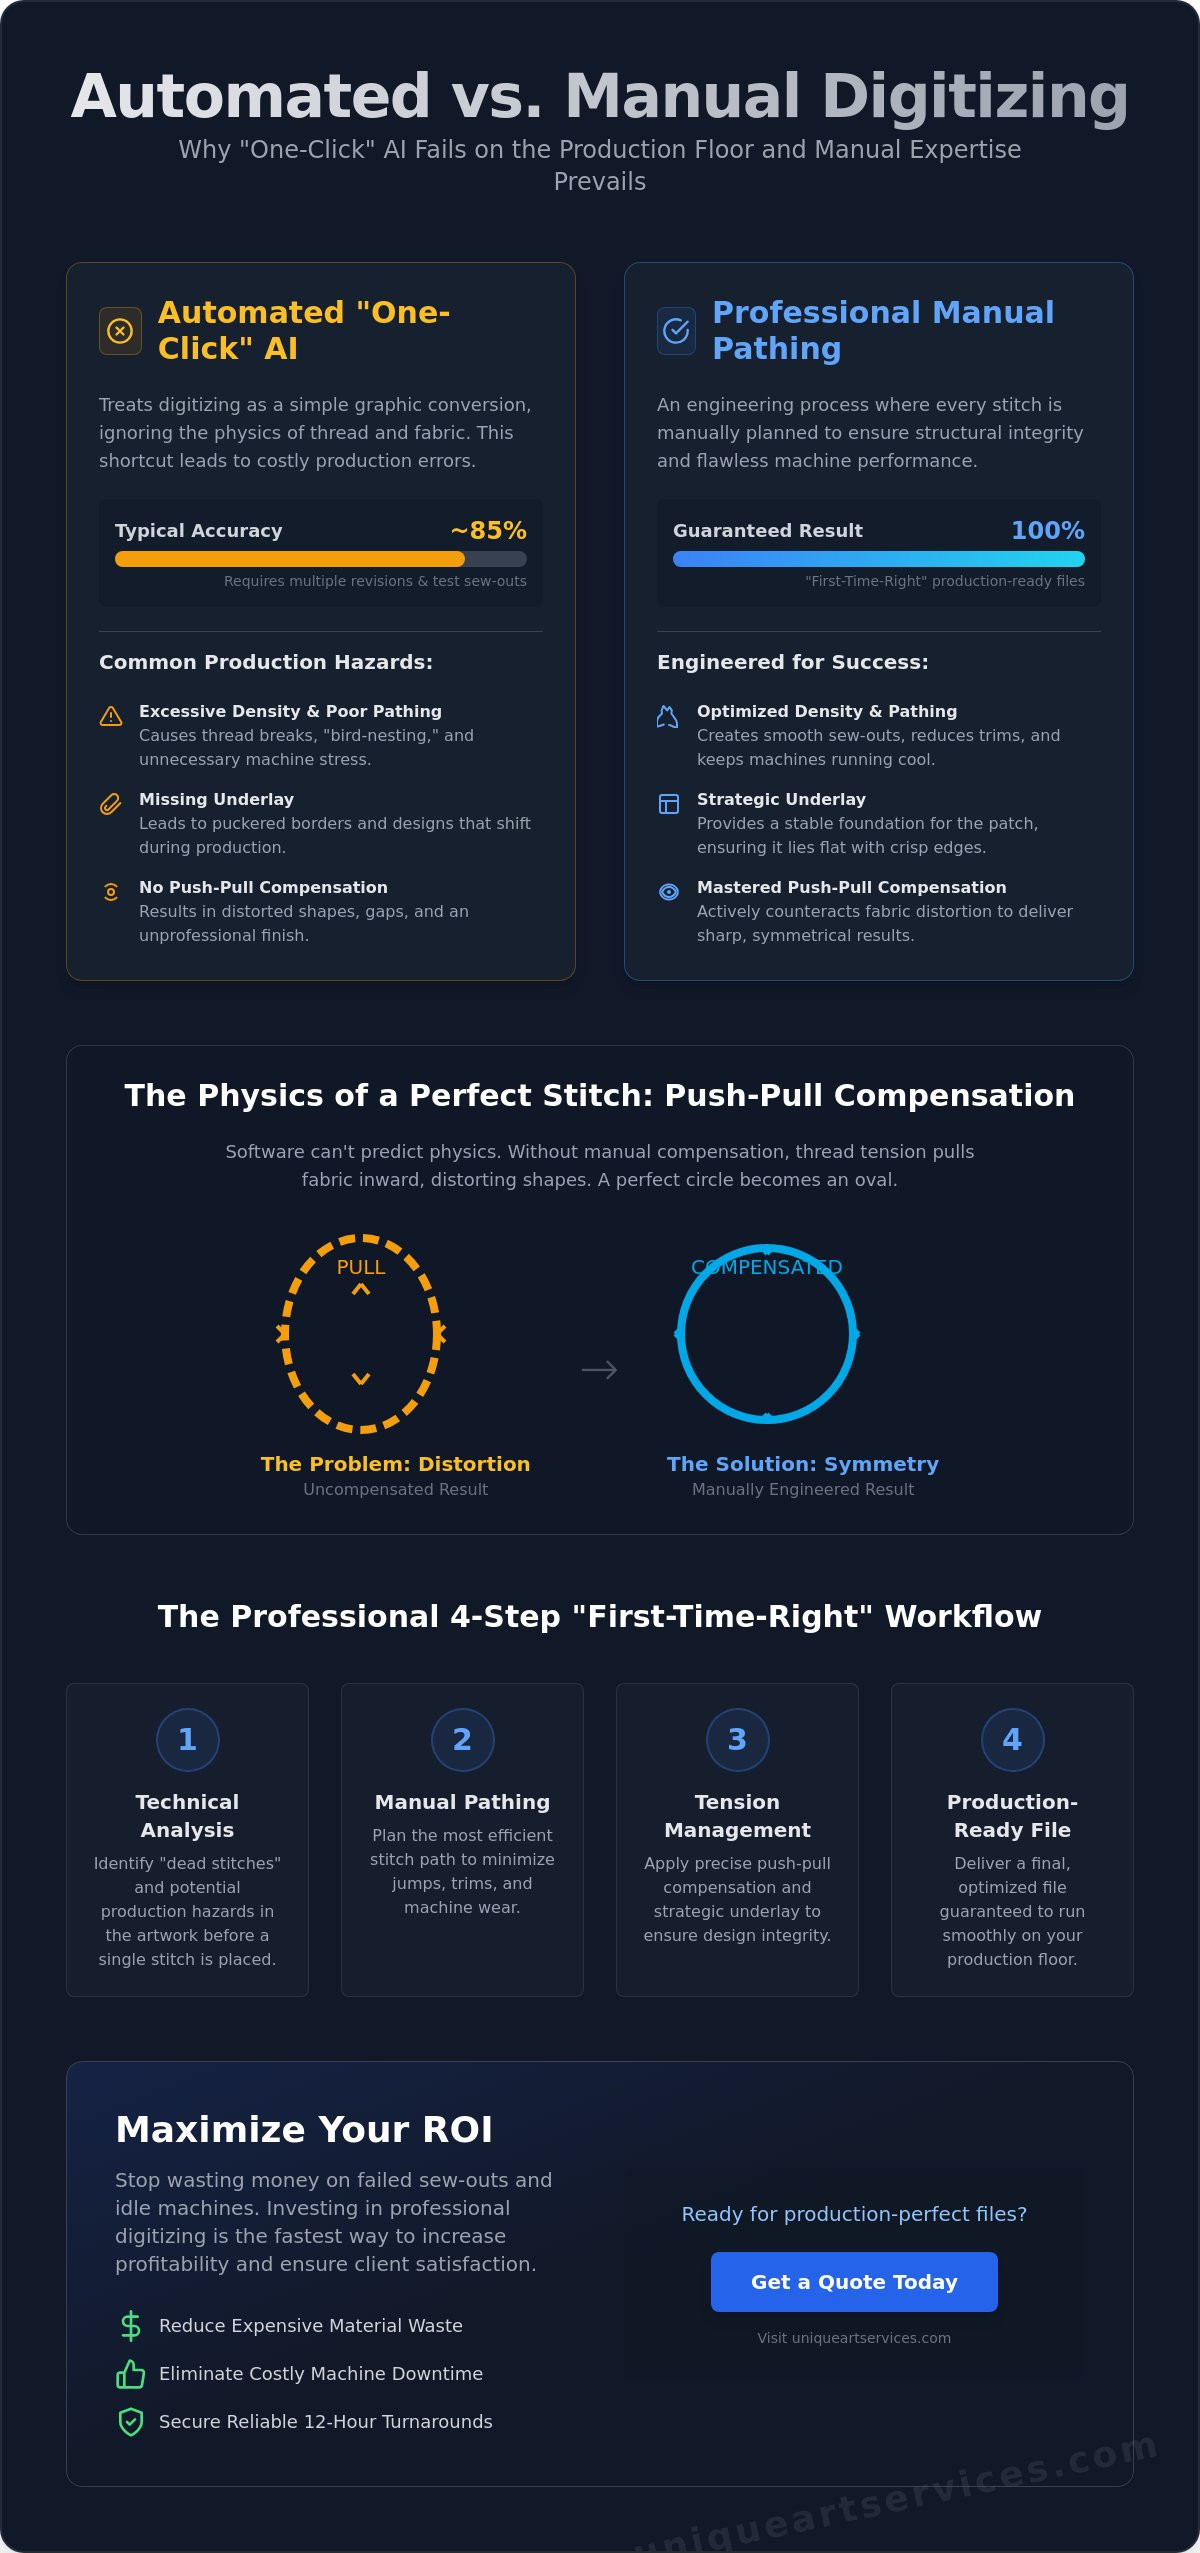
Many shop owners are lured by the promise of “one-click” conversion. It sounds efficient, but in reality, it’s a shortcut that leads to production delays. High-quality embroidery digitizing for patches is not a simple graphic conversion; it is a manual architectural process. You aren’t just tracing an image. You are building a structural foundation that must withstand the high-speed movement of a commercial machine. When you treat digitizing as a mere software task, you ignore the physical variables that determine whether a design will actually sew out correctly.
Software-based AI tools are excellent at identifying colors and shapes, but they cannot interpret the physics of thread. For example, AI cannot predict how much a specific fabric will pull during high-density fill stitches. This lack of foresight results in gaps between colors or distorted borders. A professional digitizer manually plans every path to ensure the design remains crisp and symmetrical throughout the entire run. This human touch is what creates a “first-time-right” file, preventing the need for multiple test samples and wasted material.
The Illusion of the Auto-Digitize Button
Automated tools consistently ignore the nuances of fabric density and needle penetration points. When software generates a file automatically, it often creates several production hazards:
- Excessive Density: AI often overlaps too many stitches in a small area, leading to needle breaks and damaged garments.
- Inefficient Pathing: The machine jumps randomly across the design, increasing the risk of thread snags and tangles.
- Missing Underlay: Auto-tools rarely provide the stabilization needed to prevent the patch from shifting during production.
These issues lead to the “bird-nesting” nightmare. Manual pathing is essential for The Ultimate Guide to Professional Embroidery Digitizing in 2026 because it prioritizes the machine’s mechanical limits. Expert pathing reduces unnecessary jumps and trims; this keeps your machines running cool and your thread intact.
Visual Accuracy vs. Machine Compatibility
It’s easy to be fooled by a beautiful preview on a computer screen. However, visual accuracy does not guarantee machine compatibility. The computerized embroidery process requires a file that manages tension effectively. Professional digitizers use a structured 4-step workflow to analyze the artwork technically before a single stitch is placed. This analysis identifies “dead” stitches. These are tiny, redundant needle penetrations that increase your stitch count and slow down production without adding any visual value. By focusing on high “first-time-right” rates, professional embroidery digitizing for patches ensures the file you receive is ready for the production floor immediately. This saves you from the cycle of endless test sew-outs and expensive file revisions.
Stitches vs. Physics: The Reality of Tension and Pathing
Every stitch is a tug-of-war between thread and fabric. High-speed embroidery machines apply significant tension to the thread as it moves through the needle. If your file doesn’t account for this mechanical stress, the result is a distorted, unprofessional mess. In embroidery digitizing for patches, physics dictates the outcome more than the artwork itself. You aren’t just creating a picture; you’re managing a series of physical forces that want to pull your design out of alignment.
The “Golden Rule” of patch density is finding the perfect balance between coverage and stiffness. If a design is too thin, the base fabric peeks through. If it’s too dense, the patch becomes “bulletproof,” causing it to curl or even break needles during production. Professional pathing ensures the patch lies flat, maintains its shape, and feels premium to the touch.
Mastering Push-Pull Compensation
Push-pull compensation is the most critical factor in achieving patch symmetry. As the needle penetrates the fabric, the thread pulls the material inward along the stitch direction and pushes it outward at the ends. Without manual adjustment, a perfect circle on your screen will inevitably become an unsightly oval on your embroidery machine. This is where automated software fails most spectacularly.
Experienced digitizers “over-build” specific areas of the design to counteract these forces. They might extend the edges of a fill or shorten the width of a satin border based on the expected tension of the machine. This technical precision is vital when working with various embroidery stitch types. Each stitch behaves differently under pressure; a fill stitch has a much stronger “pull” than a running stitch, and the digitizer must compensate for both simultaneously.
Foundation Stitches: The Unsung Heroes
Underlay stitches provide the structural foundation for your patch. They act like the rebar in a concrete slab, stabilizing the fabric before the decorative top-stitching is applied. Without a proper underlay, the final stitches will sink into the material, leading to uneven textures and “grinning,” where the base fabric shows through the gaps.
You must match your underlay strategy to the final patch backing. A patch destined for a velcro backing requires a different stabilization path than one designed for iron-on adhesive or a simple sew-on application. Quality foundation pathing prevents the patch from shifting during the high-speed production process. If you want to avoid the frustration of puckered edges and distorted logos, our professional digitizing services provide the technical expertise needed to get your files production-ready on the first attempt. We ensure the pathing order moves from the center outward, preventing fabric bunching and ensuring your patches stay perfectly flat.
The ‘One File Fits All’ Myth: Patches vs. Standard Apparel
One of the most expensive mistakes an embroidery shop can make is assuming a left-chest logo file is interchangeable with a patch file. While the visual design might look identical, the underlying architecture is fundamentally different. Standard apparel digitizing is designed to move with the fabric. In contrast, embroidery digitizing for patches must create a self-contained, rigid structure that maintains its integrity even after it is removed from the embroidery hoop. A file digitized for a soft cotton polo will likely fail when applied to heavy patch twill, leading to distorted shapes and poor edge quality.
Patches are subjected to much higher levels of abrasion and frequent washing compared to standard garment embroidery. This requires a specific approach to density and pathing. If you use a standard garment file for a patch, the stitches often appear “sunken” or sparse. Professional patch files utilize a higher density profile and specific pathing orders to ensure the design remains vibrant and durable for years of wear.
Border Engineering for Patches
The border is the most critical structural element of any patch. You must decide early in the process whether you are digitizing for a merrowed edge or a satin stitch border. Merrowed edges require a “bleed” area; this is a simple running stitch path that allows the overlock machine to grip the fabric without cutting into the design. If this bleed is missing, the border will eventually detach from the patch body.
Satin stitch borders provide that classic die-cut look but require significant density to prevent the fabric from fraying. This density is also vital when digitizing small lettering for embroidery on a patch. Because patch twill is so thick, small text needs a firmer foundation and higher stitch count to remain legible. Without these adjustments, fine details will simply disappear into the fabric grain.
Fabric Specificity and Stitch Count
Patch twill behaves differently than the stretchy mesh of a polo or the thick fleece of a hoodie. It is a stable, non-stretch material that requires less push-pull compensation than apparel, but it demands more aggressive underlay to prevent the design from shifting. Many amateur digitizers believe the myth that “more stitches” automatically means “better quality.” This is false. Over-digitizing leads to a patch that is too stiff, causing it to curl at the corners.
The goal is to optimize the stitch count. You want enough coverage to hide the base fabric while keeping the file efficient enough to run quickly on your machines. Professional embroidery digitizing for patches focuses on this balance. By reducing unnecessary “dead” stitches, you can lower your production time by 10% to 15% per run. This efficiency directly impacts your daily output and your bottom line. Pathing order is the final key; building the design from the center outward ensures the patch stays perfectly flat throughout the entire production cycle.
The Speed Myth: Can High-Quality Digitizing Be Done in Hours?
Many embroidery shop owners believe that speed and quality are mutually exclusive. They have likely been burned by “rush” services that deliver files riddled with thread breaks and machine-stopping errors. However, true efficiency in embroidery digitizing for patches isn’t about rushing the work; it’s about eliminating the trial and error that plagues amateurs. High-speed delivery is a byproduct of technical mastery, not a lack of care.
Our process relies on a structured 4-step professional workflow: Technical Analysis, Pathing, Quality Control (QC), and Delivery. This system ensures that even the most aggressive deadlines are met without compromising the file’s integrity. With 15+ years of industry experience, our senior digitizers perform “mental pathing” before a single stitch is placed. They visualize the entire sequence, identifying potential tension issues and density traps before the software is even opened. This professional foresight contributes to a 99% first-time-right rate, ensuring your machines keep running without interruption.
The 4-Hour Rush Order Framework
Hitting a 4-hour window requires prioritizing technical complexity analysis from the moment the artwork arrives. We identify fine details that might require density adjustments early in the process. Manual redrawing is often faster than trying to fix the messy, overlapping paths of an auto-trace tool. By redrawing the art specifically for thread, we bypass the common errors that lead to production delays. A dedicated global team provides 24/7 coverage, allowing us to process your urgent orders while your local shop is closed for the night.
Why Quality Checks Are Non-Negotiable
Quality checks are the backbone of a reliable service. We perform a “virtual sew-out” for every file to identify potential thread breaks before the client ever receives the design. This rigorous testing standardizes our embroidery digitizing services for global consistency. We don’t just send a file; we ensure total machine compatibility across DST, PES, and EXP formats.
Speed should never come at the expense of your machine’s performance. If you need production-ready files that respect your tightest deadlines without causing shop floor headaches, partner with our expert digitizing team today. We specialize in embroidery digitizing for patches that run smoothly from the very first stitch, allowing you to hit your client deadlines with total confidence.
Maximizing Your ROI with Professional Patch Digitizing
Return on investment in the embroidery business is measured by machine uptime. Many shop owners focus on the upfront cost of a file while ignoring the hidden expenses of poor quality. “Cheap” embroidery digitizing for patches often results in frequent thread breaks, needle damage, and wasted material. If your machine stops every ten minutes to address a pathing error, you aren’t saving money; you’re losing production capacity. True ROI comes from files that allow your equipment to run at its maximum rated speed without interruption.
Production-ready files act as a force multiplier for your shop. When a design runs smoothly from start to finish, your daily output increases. This efficiency allows you to take on more clients and hit tighter deadlines. We position ourselves as the technical backbone of your production schedule. By providing files that work the first time, we eliminate the need for costly test sew-outs and revisions. Our flat-rate pricing model also provides the financial predictability you need for accurate project bidding in 2026.
The Unique Art Services Advantage
We bring over 15 years of specialized experience to every project. We’ve mastered the nuances of complex patch and logo digitizing, ensuring that every stitch serves a structural purpose. Our global reach allows us to provide local-level support to clients in the US, UK, and Australia. This wide footprint means we understand regional market standards and machine requirements. Because we prioritize technical analysis and manual pathing, over 99% of our designs are production-ready on the first attempt. You receive a file that is optimized for your specific machine and material, every single time.
Ready to Scale Your Production?
Scaling your business requires a partner that can keep pace with your growth. Submitting your first order is a straightforward process designed for maximum speed. Our standard 12-hour turnaround ensures your files are ready before your next shift begins. For those high-pressure moments, our 4-hour rush processing handles last-minute client requests with the same level of precision. Don’t let poor digitizing slow down your machines or damage your reputation. Experience the precision of Unique Art Services—get your patch digitized today!
Drive Production Success with Technical Precision
Success in 2026 requires moving beyond the “one-click” mindset. You’ve seen how manual pathing and a deep understanding of thread physics are the only ways to prevent machine downtime and wasted material. Professional embroidery digitizing for patches ensures your designs stay flat, your borders remain crisp, and your production floor stays active. By treating every design as a unique architectural project, you secure the reliability your clients expect.
We provide the stable, expert backbone your creative enterprise needs to thrive. With 15+ Years Industry Experience and a 99% First-Time-Right Rate, we eliminate the friction from your daily workflow. Whether you need a 12-Hour Standard turnaround or a 4-Hour Rush for urgent deadlines, our team delivers production-ready files that run perfectly on the first sew-out.
Scale your production with professional custom embroidery digitizing—Order Now
We look forward to helping you reach new levels of efficiency and craftsmanship in your patch production.
Frequently Asked Questions
What is the best file format for embroidery digitizing for patches?
DST is the industry standard and the most reliable file format for commercial patch production. It is a stitch-based format that almost every commercial embroidery machine reads without translation errors. While other formats like PES or EXP are used for home machines, DST remains the gold standard for high-volume manufacturing. We ensure every file is compatible with your specific machine requirements to prevent software errors during the production run.
Can I use a regular logo file to make a custom patch?
You cannot use a standard apparel logo file for a standalone patch without significant modifications. Patch files require a self-contained structure with higher density and specific underlay to maintain their shape once removed from the embroidery hoop. A standard file will result in a flimsy, distorted patch that lacks the necessary rigidity for iron-on or velcro backings. Professional embroidery digitizing for patches specifically accounts for these unique structural needs.
Why does my patch have gaps between the border and the design?
Gaps usually occur because the digitizer failed to account for push-pull compensation in the file. As the machine sews, the thread tension pulls the fabric inward; this creates a physical shift that automated software often ignores. Manual pathing corrects this by slightly overlapping the design elements into the border area. This ensures a clean, seamless finish where no base fabric is visible between the design and the edge of the patch.
How long does it take to digitize a complex patch design?
A professional, production-ready file typically takes 12 hours for standard processing. This timeframe allows for a full technical analysis, manual pathing, and a rigorous quality control check. For urgent client deadlines, we offer a 4-hour rush service that maintains the same level of precision. High-quality embroidery digitizing for patches depends on this structured workflow to ensure the design runs smoothly on your machines without requiring multiple test sew-outs.
What is push-pull compensation in patch digitizing?
Push-pull compensation is a technical adjustment made during the digitizing process to counteract the movement of fabric under needle tension. Thread tension pulls the fabric together along the stitch line and pushes it out at the ends. A professional digitizer manually “over-builds” certain sections of the design so the final stitched result matches the original artwork perfectly. Without this compensation, circles become ovals and borders become misaligned during production.
Is manual digitizing really better than auto-digitizing software?
Manual digitizing is significantly better than auto-digitizing because it prioritizes machine logic over simple image tracing. Automated software cannot interpret fabric density, tension variables, or efficient pathing sequences. This often leads to “bird-nesting” and frequent thread breaks. Manual pathing ensures a logical flow from the center outward; this stabilizes the design and reduces unnecessary trims, which increases your shop’s daily output and protects your equipment.
What is the difference between a merrowed border and a satin border in a digital file?
The primary difference lies in how the edge is finished and the “bleed” required in the digital pathing. A merrowed border is a thick, overlocked edge created by a separate machine, requiring the digitizer to leave a running stitch guide as a marker. A satin border is sewn directly by the embroidery machine to create a clean, die-cut look. Choosing the right border type in the digital file is essential for the structural integrity and final aesthetic of the patch.
Can you digitize small text on a patch without it becoming a blob?
We digitize small text successfully by using specific stitch types and higher density settings tailored for heavy patch twill. Standard text settings often sink into thick fabric, causing letters to blur together. By manually adjusting the “pull” compensation and using a firm underlay, we keep the characters sharp and legible. This precision ensures that even complex logos with fine lettering remain clean and professional on the final production-ready patch.