Logo Digitizing Buying Guide: Achieving Production-Ready Precision in 2026
A poorly digitized file is the most expensive “saving” your embroidery business will ever make. While automated software promises instant results for pennies, the reality often involves constant thread breaks, ruined premium apparel, and hours of wasted machine downtime. Professional logo digitizing is not just about converting an image into stitches. It is a complex manufacturing blueprint that must account for the physics of fabric push and pull. Success in high-volume production requires a file that runs smoothly on industrial machines from the first stitch to the last.
We understand the frustration of delivering inconsistent results to a high-value client because a file lacked proper pathing. This guide will help you master the technical criteria required to achieve production-ready precision in 2026. You’ll learn how to identify quality manual digitizing, avoid common pitfalls like stitch inflation, and maintain brand consistency across every garment. We will examine the critical differences between manual craftsmanship and automated shortcuts so you can secure a reliable partner for your high-volume outsourcing needs.
Key Takeaways
- Learn why a digitized file serves as a technical manufacturing blueprint and how poor pathing leads to costly production downtime.
- Discover the four pillars of a production-ready file, including precision pathing and density management to avoid stiff or “messy” designs.
- Identify the critical criteria for selecting a logo digitizing partner, focusing on 12-hour standard turnarounds and post-delivery technical support.
- Master the 5-step artwork checklist to ensure your source files translate perfectly across different garment types, from structured hats to delicate polos.
- Understand how manual craftsmanship ensures consistent brand quality that automated software simply cannot replicate.
What is Logo Digitizing and Why It Dictates Your Brand’s Physical Quality
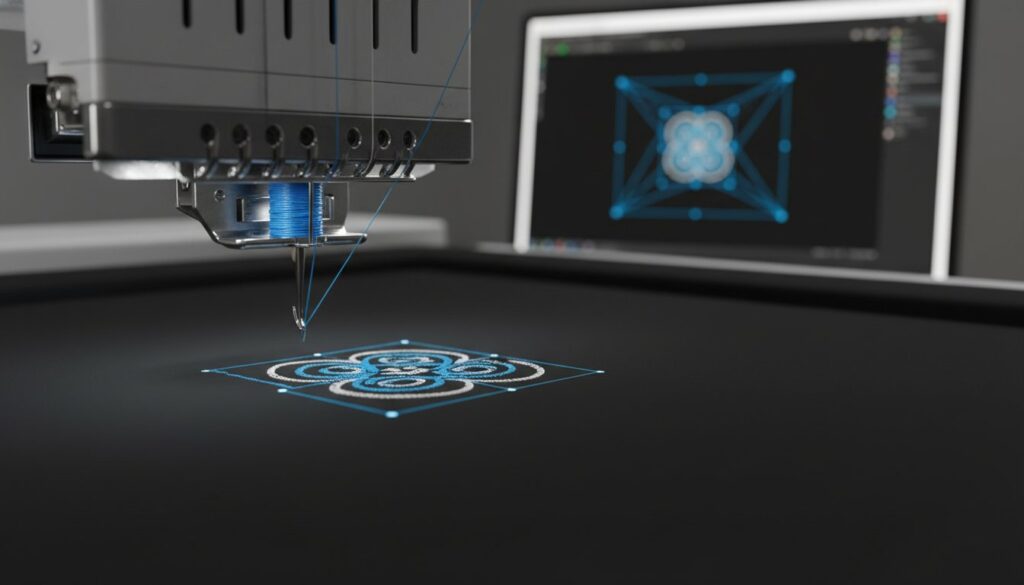
Professional logo digitizing is the technical bridge between a creative concept and a physical product. It is the specialized process of converting 2D artwork into precise digital pathing instructions that an embroidery machine can interpret. Think of a digitized file as a manufacturing blueprint. If the blueprint contains even a minor error, the entire production line faces failure. In the world of high-speed industrial embroidery, a file is not just a picture; it is a set of commands that dictates exactly how a machine interacts with fabric.
The shift from pixels to stitches represents a fundamental change in data. While a standard graphic file relies on raster data or vector paths to define shapes, an embroidery machine operates on a grid of X-Y coordinates. Professional digitizing translates these visual elements into a logical sequence of needle penetrations. This level of precision preserves the fine details of a brand that automated tools often lose. To appreciate the evolution of this technical requirement, it helps to understand What is Embroidery as both a historical craft and a modern industrial process.
Graphic Design vs. Stitch Design: A Critical Distinction
A common misconception is that graphic design and stitch design are the same. They are not. Graphic files like JPEGs or PNGs describe color and shape for a screen or printer. In contrast, stitch files describe physical movement, motor speed, and thread tension. You cannot simply “save as” an embroidery format because a computer cannot automatically determine the best path for a needle to follow. The transition from visual art to mechanical instruction is the core of digitizing. Without a human expert to define the start and stop points, the machine lacks the logic required to produce a clean result. Understanding the fundamental differences between vector vs raster file formats is essential knowledge for any brand owner working with embroidery or print vendors.
The Pitfalls of Automated ‘Auto-Digitizing’ Software
Many low-cost services rely on “auto-digitizing” software to generate files instantly. This approach lacks the intuition necessary to handle the physics of fabric. Every fabric type has a specific “push and pull” factor. As the needle adds thread, the fabric moves. Manual logo digitizing accounts for this movement by adding compensation into the file. Automated software often ignores these variables, leading to excessive thread breaks and “bird-nesting,” where thread bunches into a tangled mess under the needle plate. To ensure your production runs smoothly, you need a file designed for the realities of the machine. You can explore more technical standards in The Ultimate Guide to Professional Embroidery Digitizing in 2026.
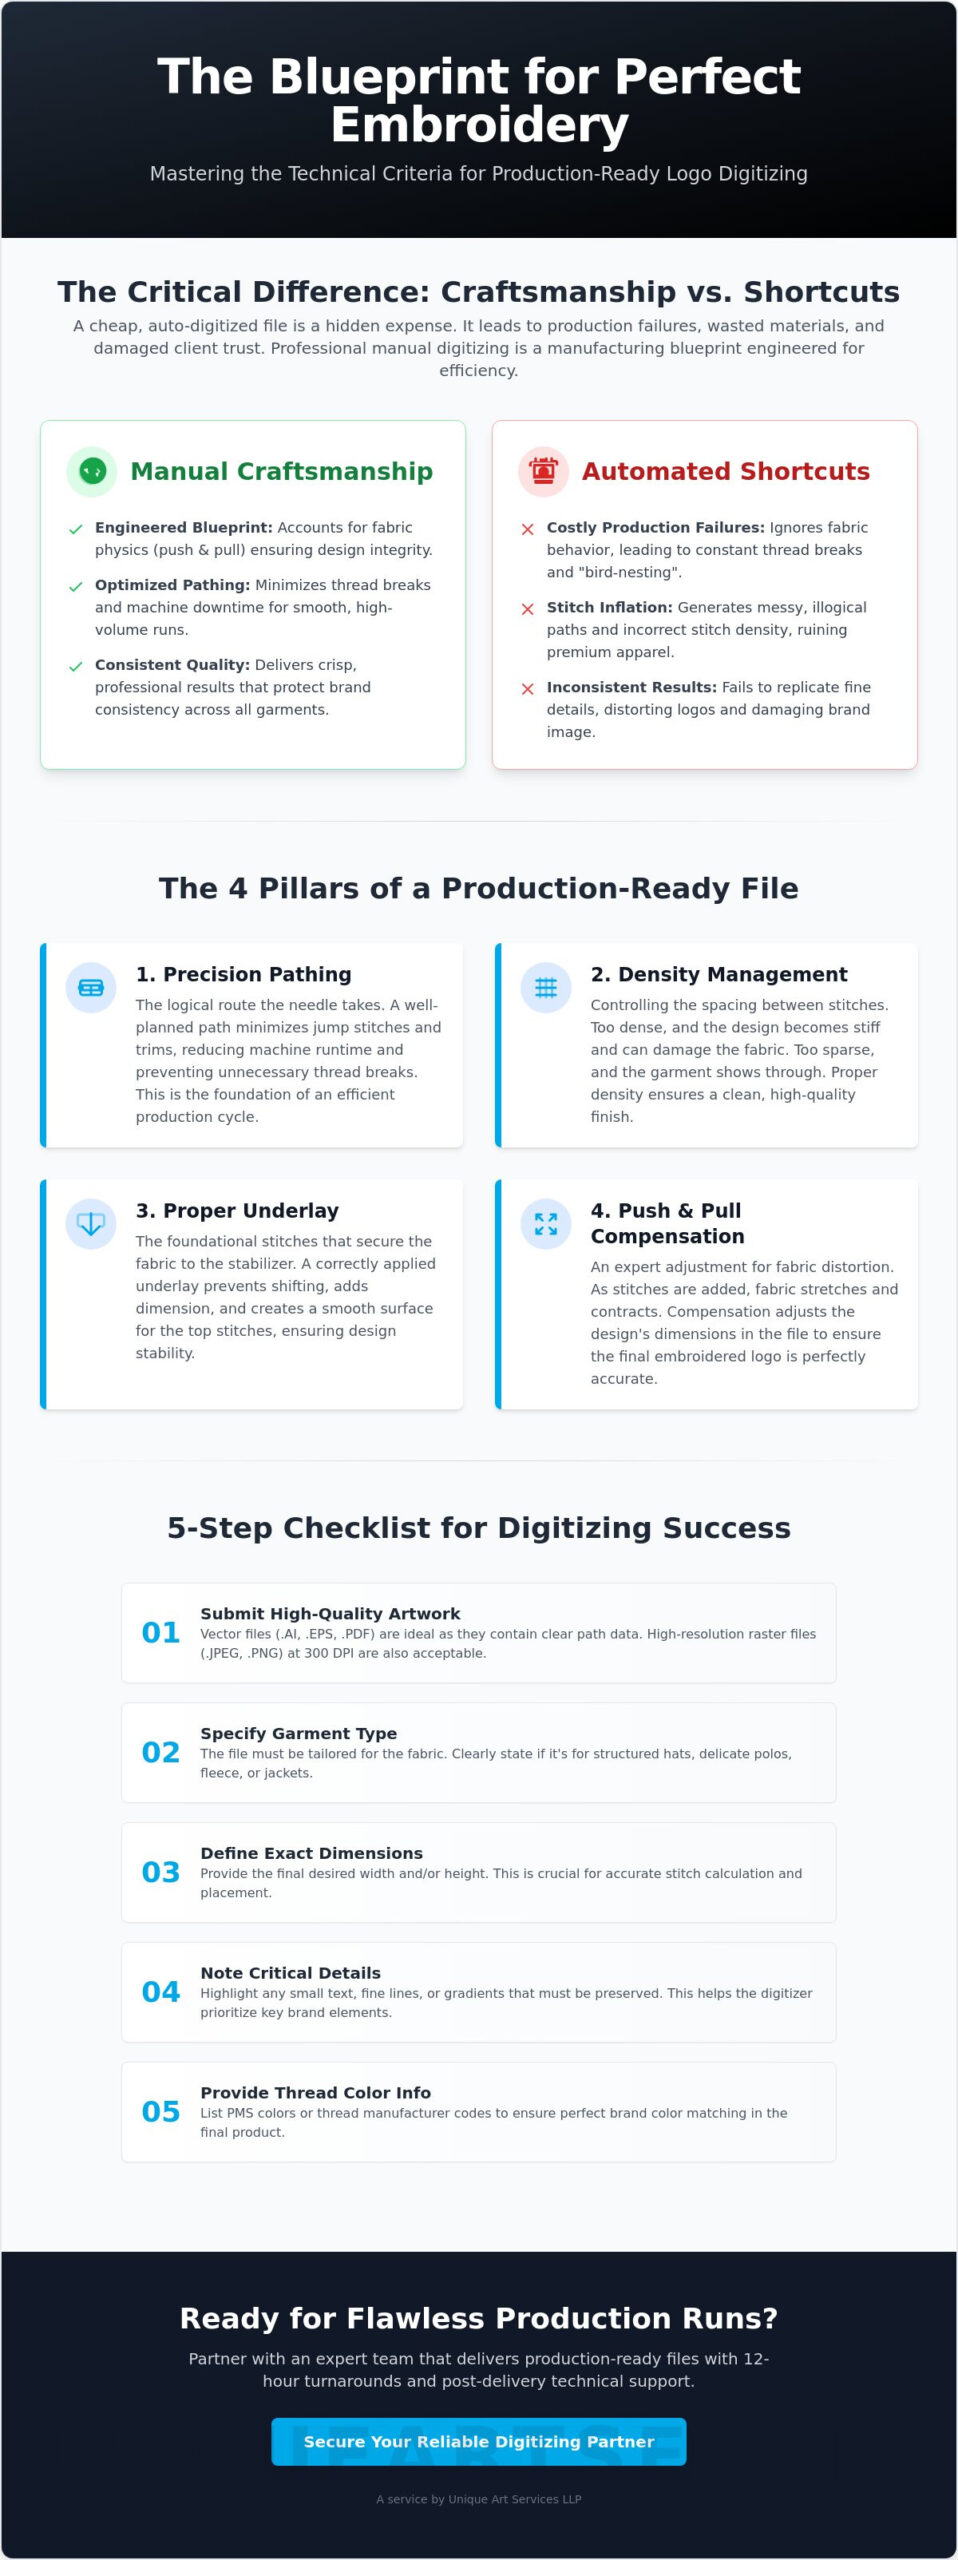
Evaluating Quality: The 4 Pillars of a Production-Ready Logo File
A production-ready file is more than a visual representation; it’s a set of technical instructions designed for machine efficiency. Technical excellence in logo digitizing rests on four specific pillars: pathing, density, underlay, and compensation. These elements ensure the final product maintains the integrity of the brand. When handling corporate identities, digitizers must understand what a trademark is to properly replicate protected visual assets without distortion or loss of detail.
Precision pathing refers to the route the needle takes across the fabric. A well-planned path minimizes jump stitches and unnecessary trims. In a high-volume shop, every trim adds seconds to the clock. Multiplied across hundreds of garments, poor pathing leads to significant labor costs and machine downtime. Density management is equally critical. If the stitches are too close together, the design becomes stiff and may even tear the fabric. If they are too far apart, the base garment will show through the logo, creating a “messy” appearance.
Underlay stitches provide the foundation. They secure the fabric to the stabilizer and create a smooth surface for the top stitches. Without proper underlay, the design lacks depth and may shift during production. Finally, push and pull compensation accounts for the dynamic nature of fabric. Because fabric stretches and contracts under the pressure of the needle, professional digitizers adjust the design’s dimensions in the software. This ensures the final embroidery matches the original artwork perfectly once it’s off the machine.
Pathing and Stitch Direction: The Secret to Smooth Embroidery
Logical pathing is a direct driver of profitability. By reducing jump stitches and optimizing the sequence of elements, efficient pathing can reduce production time by up to 20% per garment. Professional pathing is the difference between a 5-minute and a 10-minute run time. Beyond speed, the direction of the stitches determines how light reflects off the thread. Strategic stitch angles create texture and dimension, making a simple logo appear premium. If you’re tired of files that cause machine downtime, consider partnering with a specialist who prioritizes technical precision in digitizing.
Underlay and Density: Preventing Fabric Puckering
Choosing the right underlay is critical for stability. A center run underlay works well for small text, while a zigzag or edge run is better for larger filled areas. Matching these types to the specific garment prevents puckering and ensures the logo lays flat. “Over-digitizing,” or using too many stitches, is a frequent mistake that ruins thin fabrics like performance polyester. You can see how these factors affect different embroidery file types to better understand the technical requirements of your specific project.
Choosing the Right Logo Digitizing Service: A Strategic Buying Guide
Selecting a partner for logo digitizing is a strategic business decision that impacts your entire production cycle. It is not just about finding the lowest bidder. You need a specialist who acts as a technical extension of your own shop. Modern logo digitizing services must offer a balance of speed, technical support, and scalable capacity. Reliability means your partner can manage a single left-chest logo or a massive jacket back order with the same level of precision.
Turnaround speed is often the deciding factor in winning client contracts. While a 12-hour standard delivery meets most needs, a 4-hour rush option is a necessity for the high-pressure orders that frequently hit your inbox. Beyond speed, technical support is non-negotiable. If a file encounters issues on a specific industrial machine, your digitizer must have the expertise to troubleshoot pathing or tension problems immediately. A 99% first-time-right accuracy rate is far more valuable than a cheap file that causes thread breaks or ruins premium apparel.
Pricing Models: Flat Fees vs. Per-Stitch Rates
Budgeting becomes much simpler when you use a flat-rate pricing model. It allows for transparent client quoting and predictable overhead. Some services still use per-stitch pricing, but this can lead to “stitch bloating.” This is an unethical practice where unnecessary stitches are added to a design just to increase the final bill. Unique Art Services LLP prioritizes transparency by offering flat-rate embroidery digitizing fees. This ensures you know exactly what your costs are before you even start the machine, protecting your margins on every job.
File Format Compatibility and Machine Standards
Compatibility is the baseline for professional service. Your files must be delivered in industry-standard formats like DST, PES, or EXP to ensure they run smoothly on any machine. Every digitized logo should also include a detailed PDF production sheet. This sheet provides a stitch map, color sequence, and estimated run times, which are essential tools for your production team. Providing these details removes the guesswork from the embroidery process. If you’re looking to streamline your workflow, follow our guide on how to convert a logo to an embroidery file.
Preparing Your Artwork for Digitizing Success: A 5-Step Checklist
Achieving flawless results starts long before the needle touches the fabric. High-quality logo digitizing requires clean, technical inputs to ensure the final product matches your brand’s vision. Providing a low-resolution thumbnail and expecting a production-ready file is a recipe for machine downtime. To ensure your project runs smoothly, follow this 5-step preparation checklist:
- Provide High-Resolution Source Files: Vector files like AI, EPS, or PDF are the industry standard for professional logo digitizing. Unlike JPEGs, they provide mathematical lines that allow for perfect tracing without pixelation. If you are unsure whether your artwork qualifies, our comprehensive guide to vector vs raster graphics explains the technical differences and which formats work best for production environments.
- Specify the Final Garment Type: The physics of a structured hat differ from a silk polo. Digitizers must adjust underlay and pull compensation based on the fabric’s specific weight and stretch.
- Define the Exact Size: Embroidery is not resolution-independent. A file digitized for a 10-inch jacket back cannot be scaled down to a 3-inch hat logo without ruining the stitch density and causing thread breaks.
- Clarify Small Text Requirements: Thread has physical thickness. If text is too small, needle penetrations will overlap and cause structural damage to the garment.
- Indicate Special Finishes: Note if the design requires 3D Puff, Applique, or metallic threads. These materials require specific pathing and density adjustments to prevent breakage and ensure a premium finish.
Optimizing Logo Complexity for Small-Scale Embroidery
Complex gradients and microscopic details often fail to translate into stitches. Simplify logos for left-chest placements to ensure maximum clarity and machine efficiency. Adhere to the “minimum 4mm” rule for legible embroidered text. Any font smaller than 4mm risks losing the openings in letters like “e” or “a,” resulting in a messy “blob” of thread. Removing overlapping elements or simplifying fine lines will significantly improve the final production quality.
Understanding the Production Environment
Your hardware and materials influence the final output. Mentioning your machine brand, such as Tajima or Barudan, allows the digitizer to optimize the file for that specific motor’s tension and speed. Similarly, specifying your thread brand, like Madeira or Isacord, ensures color matching accuracy across your entire order. Providing these technical details ensures your production-ready file performs perfectly from the first stitch. Submit your artwork for professional logo digitizing today to guarantee production-ready results.
Unique Art Services LLP: Your Global Hub for High-Precision Logo Digitizing
For more than 15 years, Unique Art Services LLP has operated as a dependable partner for embroidery businesses requiring technical excellence. We combine rigorous technical analysis with manual craftsmanship to ensure every file we deliver is production-ready. Our approach eliminates the guesswork that lead to machine downtime. By focusing on a first-time-right commitment, we maintain a success rate of over 99%. This dedication allows your industrial machines to run without interruption, protecting your margins and your reputation on every project.
Efficiency is the core of our global operation. With dedicated service hubs in the US, UK, Canada, and Australia, we provide local support on a global scale. We understand that in a high-volume production environment, every hour counts. Our standard 12-hour delivery sets the industry benchmark, while our 4-hour rush order processing serves as a vital resource for your most urgent client deadlines. We don’t just provide files; we provide the stability your creative enterprise needs to thrive in a competitive market.
Scalable Solutions for High-Volume Embroidery Shops
Our workflow is specifically designed to integrate with the needs of large-scale apparel manufacturers and promotional distributors. Unlike automated services that rely on software shortcuts, we prioritize manual redrawing for both logo digitizing and vector art. This ensures that every path is logical and every stitch is purposeful. Before any file reaches your inbox, it undergoes a thorough quality check process. This multi-stage review verifies density, pathing, and compensation settings against your specific garment requirements. This level of scrutiny is why high-volume shops trust us to handle their most complex jacket back and left-chest designs simultaneously.
Getting Started with Unique Art Services LLP
We’ve streamlined our engagement process to be as frictionless as possible. Starting a project is simple. Once you submit your artwork, our team performs a rapid analysis of stitch complexity to provide a clear path forward. We believe in total transparency, which is why we offer flat-rate pricing with no hidden fees for rush processing or technical support. You’ll receive industry-standard files that are compatible with your specific hardware, accompanied by detailed production sheets to guide your team. Experience the difference of professional logo digitizing today and see how our precision can transform your production efficiency.
Secure Your Production Success with Technical Precision
Success in embroidery manufacturing hinges on the transition from a visual concept to a flawless technical blueprint. By mastering the pillars of pathing, density, and compensation discussed in this guide, you can eliminate the friction of thread breaks and machine downtime. Professional logo digitizing is the backbone of brand consistency, ensuring that your high-volume production runs smoothly and your premium apparel remains defect-free. When every stitch is purposeful, your shop operates with the efficiency required to meet modern market demands.
Unique Art Services LLP stands as a stable partner for businesses that cannot afford production delays. With over 15 years of industry experience and a 99%+ first-time-right rate, we deliver the precision required for today’s industrial machines. Our global hubs provide the support you need to maintain a reliable production schedule without sacrificing quality. Get your logo digitized in as little as 4 hours with Unique Art Services LLP and secure a reliable manufacturing partner today. We look forward to helping you achieve production-ready perfection on every order.
Frequently Asked Questions
What is the best file format for logo digitizing?
Vector files such as AI, EPS, and PDF are the superior choice for the digitizing process. These formats provide mathematical paths that allow for clean tracing and precise stitch placement. While high-resolution rasters are acceptable, vector art ensures the most accurate reproduction of your brand’s fine details. Providing these files helps the digitizer maintain perfect proportions without the pixelation found in low-quality JPEGs.
Can any logo be digitized for embroidery?
Almost any logo can be converted, but extreme complexity often requires simplification for physical production. Small text under 4mm or intricate gradients may not translate well to thread. A professional logo digitizing service will analyze your artwork and suggest adjustments to ensure the final product remains legible and machine-friendly. This ensures your brand looks sharp regardless of the garment’s texture.
How much does professional logo digitizing cost?
Pricing typically follows a flat-rate or a per-stitch model depending on the service provider. Flat fees offer predictable budgeting for standard designs, while larger, high-stitch-count projects like jacket backs are often calculated based on complexity. Choosing a flat-rate partner helps you quote clients accurately without worrying about “stitch bloating” inflating your final bill. This transparency is essential for maintaining your shop’s profit margins.
What is the difference between logo digitizing and vector conversion?
Vector conversion creates a scalable graphic for printing, whereas logo digitizing creates a technical blueprint for embroidery machines. While vector art defines visual shapes, a digitized file contains specific commands for needle movement, stitch density, and thread tension. Both are essential but serve entirely different manufacturing purposes. You cannot use a vector file directly on an embroidery machine without this critical conversion step.
How long does it take to digitize a logo for embroidery?
Standard industry turnarounds typically range from 12 to 24 hours for most professional services. High-capacity firms often provide rush options that can deliver production-ready files in as little as 4 hours. This speed is critical for modern shops that need to fulfill urgent client orders without delaying their machine schedules. Reliable partners maintain these speeds without sacrificing the technical precision of the final stitch file.
Why do I get thread breaks with my digitized file?
Frequent thread breaks are usually caused by technical errors in the stitch file like poor pathing or excessive density. If the needle penetrations are too close together or the pathing includes unnecessary jumps, the machine will struggle. Professional manual digitizing accounts for fabric physics to ensure smooth, uninterrupted production runs. A well-digitized file should run from start to finish with minimal human intervention.
Can I use the same digitized file for hats and shirts?
It’s not recommended because structured hats and soft shirts require different push and pull compensation. A file digitized for a flat shirt will often shift or pucker when run on a curved hat frame. For the best results, your digitizer should optimize the file specifically for the garment type you intend to use. This prevents registration issues where outlines don’t line up with the filled areas of the design.
What is a DST file and why is it the industry standard?
A DST file is a stitch format originally developed by Tajima that has become the universal language for industrial embroidery machines. It contains only the essential X-Y coordinates and machine commands like trims and color changes. Because it’s a streamlined format that focuses purely on machine movement, it runs reliably on almost any professional machine brand. It’s the most common file type requested by commercial embroidery operators worldwide.