Converting Pictures to Vector Format: Why Manual Precision Beats Auto-Tracing
What if the “free” one-click tool you used for converting pictures to vector format is actually costing you hours of manual cleanup and production delays? It’s a common frustration for designers and business owners alike. You start with a low-resolution image, run it through an automated tracer, and end up with jagged lines that look unprofessional when enlarged. These messy results might look acceptable on a small screen, but they fail immediately when sent to a commercial printer or an embroidery machine.
We understand that your time is valuable and your brand’s reputation depends on visual clarity. You need a file that works perfectly the first time, without the need for endless tweaks. This article explores the technical gap between automated software and manual redrawing. You’ll learn how to achieve the mathematical precision required for professional-grade branding and manufacturing.
We’ll compare the latest AI features in Adobe Illustrator 2026 against the quality of hand-traced artwork. We will also outline the specific requirements for transforming a blurry logo into a production-ready vector file that maintains its integrity at any scale.
Key Takeaways
- Understand how raster-to-vector conversion transforms pixels into mathematical paths for infinite scalability without any loss of quality.
- Learn why automated tracing software often creates “node bloat” and jagged lines that cause significant issues during the manufacturing process.
- Discover the specific technical requirements for converting pictures to vector format to ensure your files are production-ready for print and embroidery.
- Identify the essential steps for preparing high-resolution source images and font references to streamline the manual redrawing process.
- Recognize how professional hand-tracing from seasoned experts eliminates the need for time-consuming edits and prevents costly production delays.
What Does Converting Pictures to Vector Format Actually Mean?
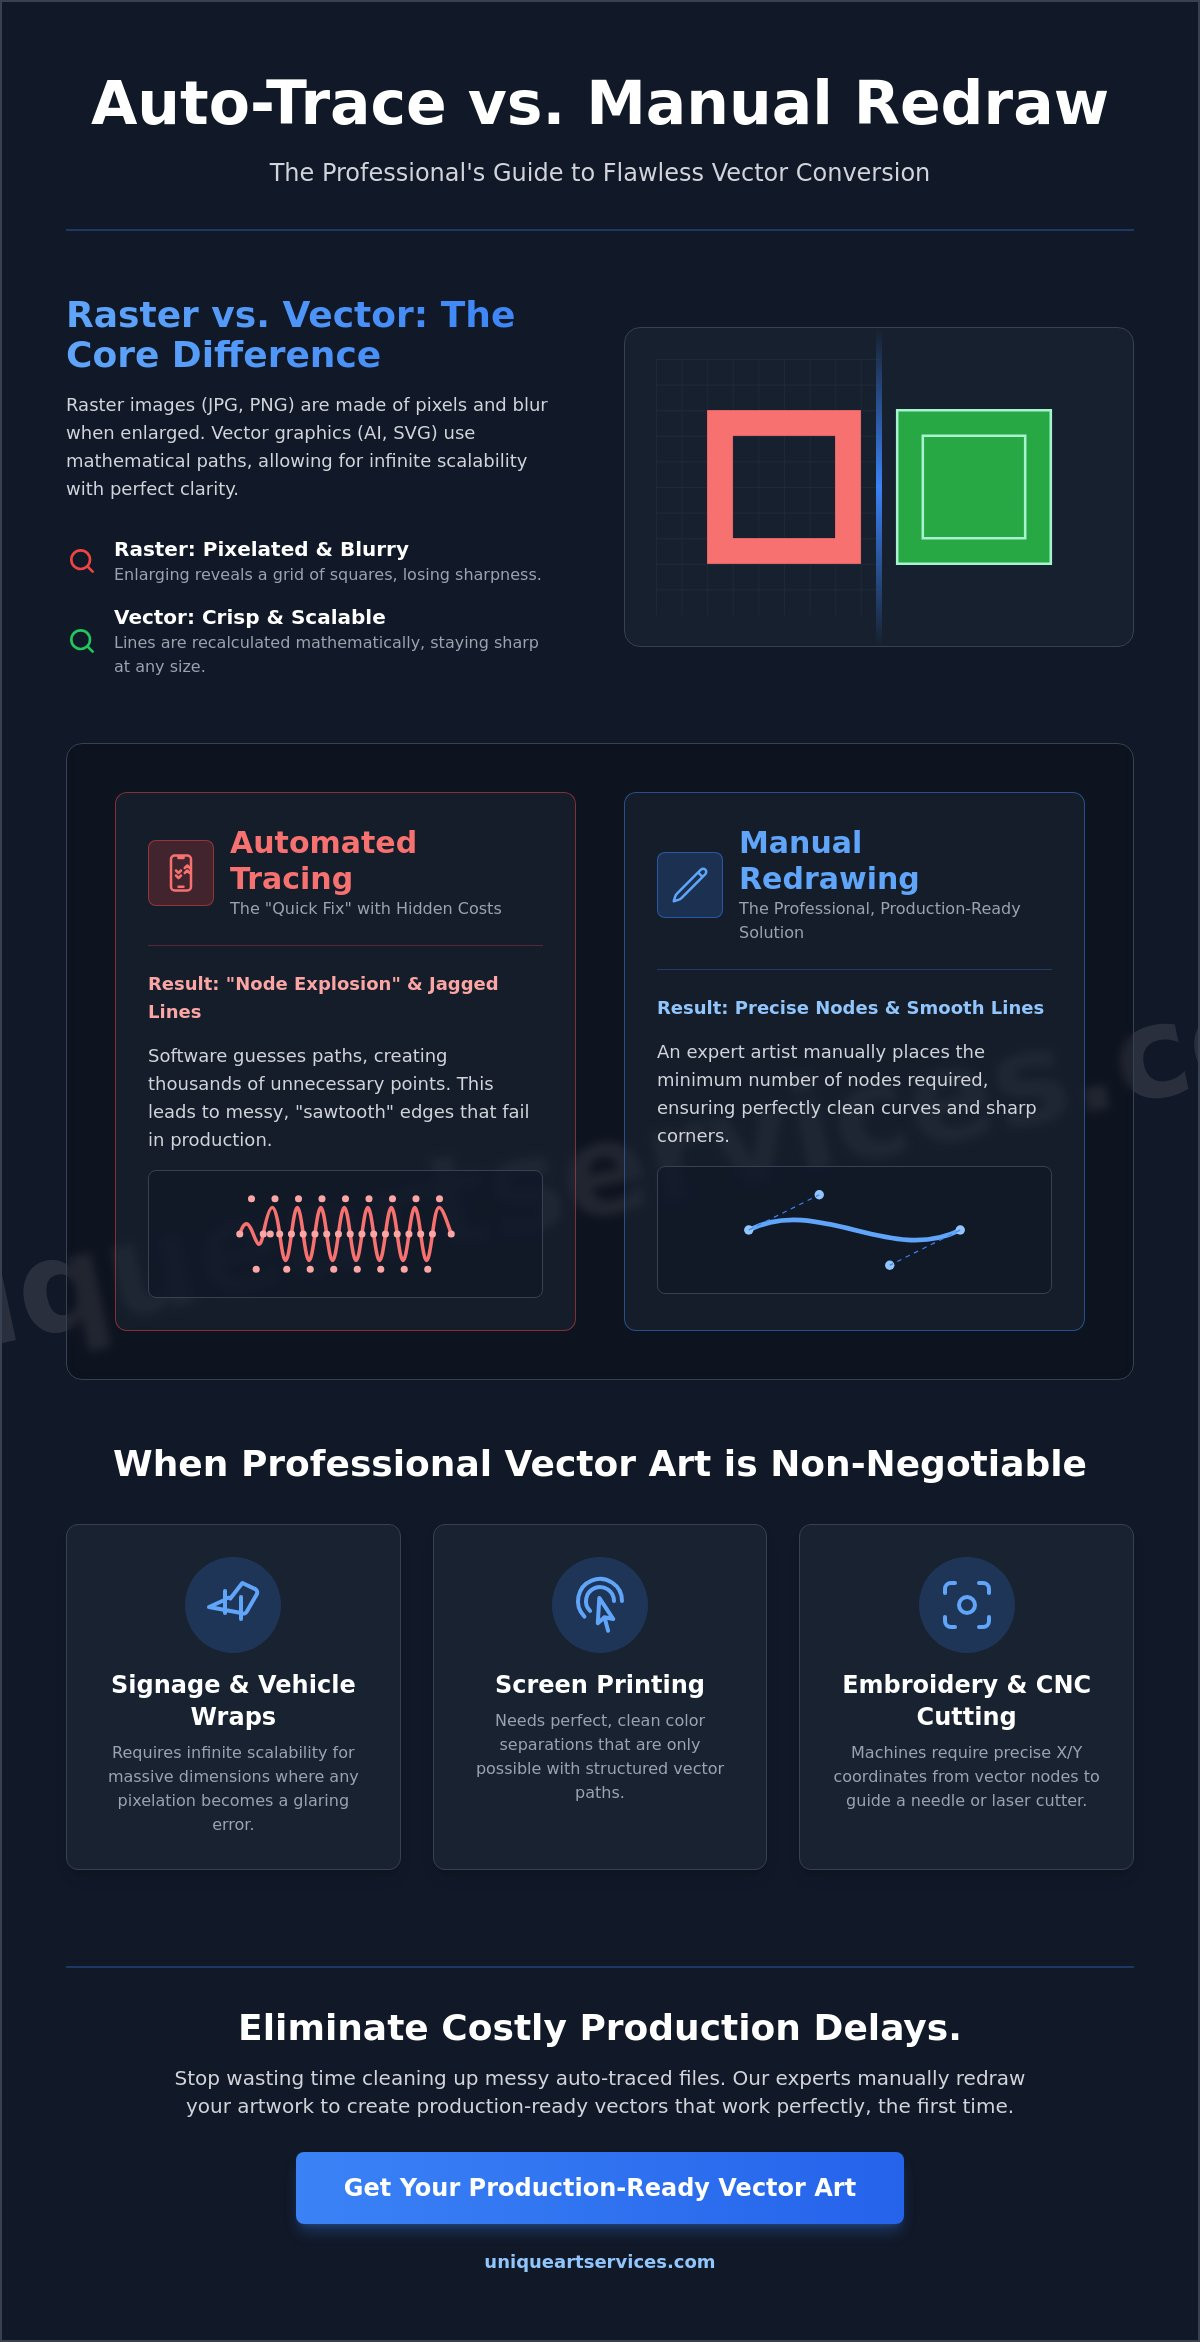
At its core, converting pictures to vector format is the process of translating an image made of static pixels into a series of mathematical instructions. Most images we encounter daily, such as photos or screenshots, are raster files. These are composed of a fixed grid of colored squares. When you enlarge a raster image, those squares become visible, leading to the blurry, blocky effect known as pixelation. Vectorization replaces this rigid grid with geometric primitives like points, lines, and curves.
This technical data model is known as Vector graphics. The magic behind this format lies in Bezier curves. These are parametric curves that use anchor points and control handles to define a shape’s path mathematically. Because the computer calculates the relationship between these points in real-time, the artwork possesses infinite scalability. You can scale a vector logo from the size of a postage stamp to the side of a Boeing 747 without losing any clarity or detail. The lines remain perfectly smooth because the math remains constant regardless of the physical size.
Raster vs. Vector: A Technical Comparison
Raster images like JPG, PNG, and TIFF are resolution-dependent. They have a hard ceiling on how large they can be printed before quality degrades. If you’ve ever tried to “enhance” a low-resolution photo for a large banner, you’ve likely encountered the pixelation trap. The computer cannot invent detail that isn’t there; it simply makes the existing pixels larger and blurrier. Vector paths eliminate this limitation. Instead of relying on a grid, vectors use nodes. These nodes tell production equipment exactly where a line starts, how it bends, and where it ends. When you scale the file, the computer simply recalculates the coordinates. The result is a clean, sharp edge every time.
It’s a common misconception that simply saving a JPG as a PDF creates a vector file. A PDF is merely a container. If you place a raster image inside a PDF, it’s still a raster image. True vectorization requires a complete structural rebuild of the artwork using paths and points. This is why professional destination formats like AI, EPS, and SVG are the industry standard for high-stakes branding.
When Vectorization is Non-Negotiable
In many production environments, a raster image simply won’t work. The equipment lacks the “intelligence” to interpret a grid of pixels. Instead, it requires a physical path to follow. This is why vector art is essential for several key industries:
- Large format signage and vehicle wraps: These projects involve massive dimensions where any imperfection in a raster file becomes a glaring error.
- Screen printing: Printers need to isolate colors into separate layers. Vector files allow for perfect color separation that raster files can’t match.
- Embroidery digitizing and CNC cutting: These machines follow a physical track. They need the precise X and Y coordinates provided by vector nodes to guide a needle or a laser cutter.
Auto-Tracing vs. Manual Redrawing: Choosing Your Method
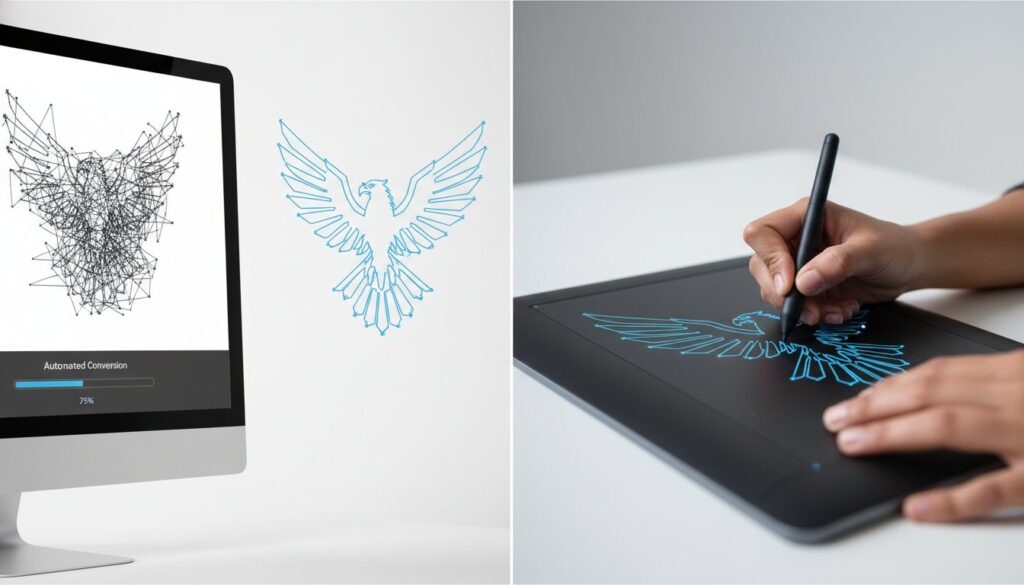
Speed is often the enemy of precision in graphic production. While many online tools promise an instant solution for converting pictures to vector format, they rely on algorithms that interpret color contrast rather than design intent. This process is essentially “best-guess” technology. The software scans for boundaries between colors and places anchor points along those edges. It lacks the human context to understand that a slightly blurry line was intended to be a perfect circle or a sharp 90-degree corner.
One of the most significant drawbacks of automated tracing is the “node explosion” problem. Because the software tries to capture every minute variation in a raster image, it creates thousands of unnecessary anchor points. These excessive data points result in jagged, “sawtooth” edges that are visible under magnification. In a production environment, this bloat is more than just an aesthetic issue. Excessive nodes can cause vinyl cutters to chatter, embroidery machines to break threads, and large-scale printers to lag or crash during processing.
The Limitations of AI and Automated Tools
Even the latest AI-powered features in software like Adobe Illustrator 2026 struggle with complex source material. Automated tools often fail to distinguish between digital noise and intentional design elements. If your original picture has grain or compression artifacts, the software will faithfully trace those errors into your vector file. This leads to “wobbly” lines and rounded corners where sharp intersections are required. Perhaps most critically, AI often fails to “read” typography. It treats letters as shapes, frequently distorting them until the brand’s font is unrecognizable and professionally unusable.
The Professional Edge of Manual Conversion
Manual redrawing involves a skilled designer hand-placing every anchor point and handle. This human-led process ensures perfect symmetry and geometric alignment that automated tools simply cannot replicate. A professional can identify the exact font used in a logo and replace distorted shapes with clean, original typefaces. This level of craftsmanship creates a file that is not only visually superior but also technically optimized. If you want to avoid the pitfalls of automation, choosing expert vector art services provides the reliability your brand needs. Every path is drawn with production in mind, ensuring a seamless transition from screen to physical product.
Industry-Specific Requirements for Vector Artwork
Production readiness is the true test of any graphic file. While a digital proof might look acceptable on a monitor, the physical manufacturing process exposes every technical flaw. Converting pictures to vector format isn’t merely an aesthetic upgrade. It’s a fundamental requirement for hardware that relies on path-based instructions. When you send a file to a production floor, the quality of that vector determines the success of the final product. Substandard files often lead to physical production errors, resulting in wasted stock and missed deadlines.
When converting pictures to vector format for commercial use, you must consider the physical constraints of the medium. Promotional products, such as pens or USB drives, have strict limitations regarding minimum line weights. If a vector path is too thin, the printing equipment can’t physically replicate it. Similarly, “trapped” white space-the gaps between design elements-must be wide enough to prevent ink from bleeding together. A professional manual conversion accounts for these physical constraints, ensuring the design remains legible even on very small surfaces.
Vectorizing for Screen Printing and Apparel
Screen printers require clean color separation to create their screens. Unlike raster images where colors often blend at the edges, vector files allow for distinct, solid layers. This is essential for accurate Pantone matching. During our manual redrawing process, we ensure that overlapping paths are eliminated. Overlaps cause unnecessary ink buildup on the garment, which can lead to cracking or a heavy, uncomfortable feel. Properly prepared files are compatible with high-mesh count screens, allowing for crisp details that won’t blur during the print run.
The Bridge to Embroidery Digitizing
A clean vector file is the essential first step for high-quality embroidery digitizing. The vector paths serve as the blueprint for stitch placement. While messy nodes cause mechanical issues, they also disrupt the logical flow of the software used to create stitch files. A hand-drawn vector ensures that the digitizer can assign efficient stitch directions without fighting distorted geometry. This same principle applies to specialized applications like anime digitizing, where preserving intricate character details and fine outlines in stitches demands an exceptionally clean vector foundation. Understanding how to select the right embroidery digitizer for your production workflow is just as critical as the quality of the vector file itself. Unique Art Services takes an integrated approach to this process. By handling the journey from picture to vector to stitch, we ensure that every path is optimized for the needle. Our vector art team works in tandem with our digitizers to guarantee a production-ready result every time. This collaborative effort results in a smoother finish on the fabric and significantly reduces production time.
A Step-by-Step Guide to Preparing Your Pictures for Conversion
Achieving a flawless result when converting pictures to vector format requires more than just sending a file. Proper preparation ensures that the final artwork aligns perfectly with your production needs. By following a structured workflow, you eliminate ambiguity and reduce the risk of costly revisions. High-quality input directly influences the speed and precision of the manual redrawing process.
- Step 1: Locate the highest resolution original. While professionals can redraw from blurry images, providing the cleanest available version ensures every detail is captured accurately.
- Step 2: Identify fonts and text elements. If your logo uses a specific typeface, providing the font name or a high-contrast reference helps the designer maintain brand consistency.
- Step 3: Specify the intended use. A vector intended for a 10-foot vinyl banner may require different detail handling than a simplified version for a 2-inch embroidered hat logo.
- Step 4: Communicate colour requirements. Clearly state if you need CMYK for offset printing, RGB for digital displays, or specific Pantone codes for brand matching.
- Step 5: Submit for professional manual redrawing. Handing your project to an expert ensures 100% accuracy and a file that is technically sound for any manufacturing equipment.
Checklist for High-Quality Source Images
Start with the right source material to get the best results. Avoid using screenshots; they introduce compression artifacts and digital noise that obscure fine details. Original files like high-quality JPGs or PNGs are always superior. Ensure the subject has strong contrast against the background so the artist can clearly see every edge. If your design includes gradients, note whether you want them preserved or converted into flat colours for specific printing methods like screen printing.
Communicating with Your Design Partner
Clarity in communication prevents production delays. Define your required output formats early in the process. Designers typically need AI files, while commercial printers often request EPS. For web applications, SVG is the standard for crisp, scalable icons. If you’re on a tight deadline, inquire about Rush Order Processing to keep your project on track. Our team maintains a 99% first-time-right rate, meaning your files are usually production-ready upon delivery. For guaranteed precision, you can order professional vector art today and receive a file that works perfectly the first time.
Professional Vector Art Services by Unique Art Services
Unique Art Services LLP has spent over 15 years perfecting the technical process of manual conversion. While automated software often compromises on detail, our team prioritizes technical integrity. We don’t use automated tracing tools. Instead, our artists hand-draw every line and curve to ensure maximum precision. This meticulous approach is the only way to guarantee a file is truly production-ready for demanding applications like large-scale printing or complex embroidery.
Efficiency is a core pillar of our service. We provide a 12-hour standard turnaround for most projects. For urgent needs, our Rush Order Processing options deliver results in as little as 4 hours. This speed doesn’t come at the expense of quality. Our rigorous quality control process ensures a 99% first-time-right success rate. You receive a file that is ready for immediate use, eliminating the cycle of revisions that often plagues automated results.
Why Global Brands Trust Our Manual Workflow
We operate dedicated service hubs in the UK, USA, Australia, and Canada to support a global clientele. This international presence allows us to handle high volumes while maintaining the attention to detail that complex designs require. Our expertise extends beyond basic shapes; we specialize in the intricate work that AI tools typically reject. Because we also excel in embroidery digitizing, our vector art is created with a deep understanding of how paths influence stitch quality and machine performance.
Get Started with Your Vector Conversion Today
Starting your next project is straightforward. We offer transparent flat-rate pricing and a simple submission process for converting pictures to vector format. You gain direct access to expert designers who can provide technical consultations for your most challenging artwork. Whether you need a refreshed brand identity or a technical file for manufacturing, we provide the stability and expertise your business requires. Our goal is to remove friction from your creative process and deliver a file that works perfectly on the first attempt.
Transform your pictures into professional vector art with Unique Art Services LLP
Achieve Production-Ready Precision for Your Brand
Manual redrawing is the only way to ensure your artwork stands up to the rigors of professional manufacturing. While automated software often produces jagged lines and excessive nodes, hand-placed anchor points deliver the clean geometry required for high-quality printing and embroidery. By converting pictures to vector format through a professional workflow, you eliminate the technical errors that lead to wasted stock and production delays.
Unique Art Services provides the stability and expertise needed to handle your most complex designs. With 15+ years of industry experience and a 99% first-time-right rate, we deliver files that work perfectly on the first attempt. We offer efficient turnaround times to match your schedule, including a 4-hour rush order available for urgent deadlines.
Take the guesswork out of your design process and ensure your brand looks its best at any scale. Let our experts provide the technical backbone for your creative projects.
Request Your Professional Vector Conversion (12-Hour Turnaround)
Frequently Asked Questions
Can I convert a low-resolution JPG into a high-quality vector?
Yes, but it requires manual redrawing rather than relying on automated tools. A designer uses your low-resolution image as a template and traces every element by hand. This process creates clean, sharp lines that remain crisp at any size. It’s the standard method for salvaging old branding or low-quality web images for large-scale printing and professional use.
What is the best file format for a vector logo?
The industry standard is the AI (Adobe Illustrator) file for design work and EPS for commercial printing. These formats preserve mathematical paths and color data perfectly. SVG is preferred for web use because it’s lightweight and scales within browsers. PDF is also common, provided the content inside is actually composed of vector paths rather than embedded pixels.
How long does it take to manually redraw a picture into a vector?
Standard turnaround for manual conversion is typically 12 to 24 hours. Complex designs with intricate details or extensive typography may require more time to ensure precision. If you have an urgent deadline, we offer a 4-hour Rush Order Processing option. This ensures your project moves into production without unnecessary delays while maintaining high technical accuracy.
Why do automated vector converters often produce messy results?
Automated tools use algorithms that struggle to distinguish between design edges and digital noise or grain. They often create thousands of unnecessary anchor points, leading to “node bloat.” This makes converting pictures to vector format through software unreliable for manufacturing. These messy paths cause issues for vinyl cutters and embroidery machines that need clean, logical lines to follow.
Is an SVG file always a vector?
No, an SVG is a container that can hold both vector paths and embedded raster images. If you simply export a pixel-based photo as an SVG, it’s still a raster file and will pixelate when enlarged. A true vector SVG must be built from mathematical paths. You can verify this by zooming in; the edges should remain perfectly sharp regardless of the magnification level.
Can a photo of a person be converted into a vector format?
Yes, but the result will be a stylized illustration rather than a photorealistic image. This process involves simplifying the photo into distinct color shapes and paths. It’s a popular choice for creating “pop art” styles or mascot logos. Because vectors use solid colors or gradients, they cannot replicate the millions of subtle color transitions found in a standard photograph.
What is the difference between vectorizing and digitizing?
Vectorizing creates a scalable graphic file, while digitizing creates a specific path for an embroidery machine to follow. Vector art uses X and Y coordinates to define shapes. Embroidery digitizing takes those shapes and adds instructions for stitch types, density, and sequence. You usually need a clean file from converting pictures to vector format before the embroidery digitizer process can begin.
Do I need special software to open a vector file?
You need professional software like Adobe Illustrator, CorelDRAW, or Affinity Designer to edit vector paths. However, most modern web browsers can view SVG files without extra tools. If you receive an AI or EPS file and don’t have design software, you can often view a preview using a standard PDF reader or an online file viewer.